Picture this: You are right in the middle of making a comforting bowl of dal tadka, your hot oil is shimmering with mustard seeds, and you reach into the vegetable crisper drawer for that final, crucial ingredient—kadi patta. But instead of pulling out a vibrant, aromatic sprig, you find a sad, slimy, black mass of leaves that smells like nothing but disappointment.
We have all been there. It is one of the most frustrating, universal struggles in an Indian kitchen. You buy a fresh bundle of herbs from your local sabzi wala, use a single sprig for a morning upma, and within three days, the rest of the batch turns black, soggy, and completely unusable.
Because curry leaves are the absolute soul of Indian tempering (tadka), having a fresh supply on hand is non-negotiable. But how do you stop them from spoiling so rapidly? In this ultimate how to guide, we are going to break down the exact, science-backed kitchen hacks on how to store curry leaves in fridge for long time so they stay bright green, crisp, and intensely aromatic for up to a whole month!

Why Curry Leaves Spoil So Quickly: The Science of Decay
Before we look at the solutions, we need to understand the enemy. Why does kadi patta rot faster than almost any other green herb in your kitchen & storage inventory?
The primary culprit is moisture imbalance.
Curry leaves contain natural essential oils that give them that signature citrusy, herbal aroma. However, once plucked from the tree, they constantly release water vapor through a process called transpiration. If you store them in a tightly sealed plastic bag without any ventilation, that trapped moisture condenses on the surface of the leaves.
   [Trapped Moisture] + [Lack of Airflow] = Bacteria & Mold Growth
   [Excessive Dryness] + [Direct Cold Air] = Leaf Oxidation (Turning Black)
This trapped water creates a breeding ground for bacteria and mold. Conversely, if you leave them exposed directly to the dry, cold air of the refrigerator, they lose their natural oils, dry out, oxidize, and turn completely black. To keep them fresh, you must hit the sweet spot: eliminating surface moisture while preserving internal hydration.
The Great Kitchen Debate: Should You Wash Curry Leaves Before Storing?
Ask three different Indian grandmothers this question, and you will get three completely different, passionate answers. Let’s settle the debate once and for all with a definitive rule:
The Golden Rule: You can wash them, but only if you have the time and patience to dry them 100% completely before they go anywhere near the refrigerator.
+--------------------------------------+--------------------------------------+
| WASHING BEFORE STORAGE               | STORING DIRTY (WASHING LATER)        |
+--------------------------------------+--------------------------------------+
| Pros: Convenient for quick cooking;  | Pros: Zero risk of trapping moisture;|
| dust and pesticides are removed early| leaves stay fresh much longer        |
+--------------------------------------+--------------------------------------+
| Cons: If even a single drop of water | Cons: You have to wash and dry them  |
| remains, the entire batch will rot  | right in the middle of cooking       |
+--------------------------------------+--------------------------------------+
The Verdict
If you are busy, do not wash them beforehand. Store them dry and dusty just as they came from the market. Simply pluck the leaves off the thick stalks, wipe them down gently with a dry kitchen towel to remove loose dirt, and store them. Wash them in a small strainer right before you drop them into your hot tadka.
If you do choose to wash them first, spread the leaves out on a clean cotton bedsheet or a large newspaper under a fan for at least 2 to 3 hours. Do not sun-dry them, as the harsh sunlight will evaporate the aromatic essential oils, leaving your kadi patta flavorless.
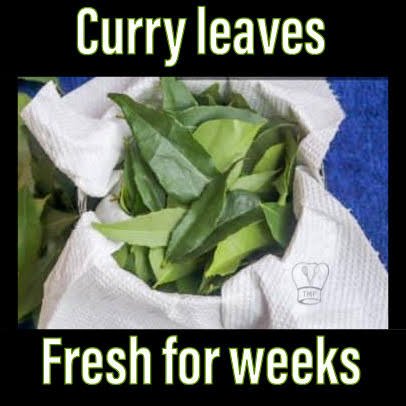
The Best Fridge Method: Dry Towel + Airtight Box
If you want your curry leaves to look as fresh as the day they were plucked even after three weeks, this is the absolute holy grail fresh herb preservation method. It takes less than five minutes to set up.
       +-----------------------------------+
       |       Airtight Box Lid            |
       +-----------------------------------+
       | ====== Paper Towel Layer ======== |
       |                                   |
       |    Plucked, Completely Dry        |
       |    Curry Leaves (Loose)           |
       |                                   |
       | ====== Paper Towel Layer ======== |
       +-----------------------------------+
       |       Box Container Base          |
       +-----------------------------------+
Step-by-Step Instructions:
- De-stem the Leaves: Gently pluck individual curry leaves away from the main woody stem. Throw away any leaves that are already bruised, yellowing, or showing black spots, as one bad leaf can spoil the whole batch.
- Line the Container: Take a clean, completely dry container and line the bottom with a double layer of high-quality kitchen paper towel.
- Layer the Leaves: Scatter the loose, dry curry leaves loosely over the paper towel. Do not press them down or pack them too tightly; they need room to breathe.
- Cover and Seal: Place another single sheet of paper towel directly on top of the leaves. This top towel acts as a shield, catching any condensation droplets that drip down from the inside lid of the container. Seal the box tightly with its airtight lid.
- Place in the Fridge: Store the container on the middle shelf of your refrigerator. Avoid the very top shelf (which can get cold enough to freeze and blacken the leaves) and avoid the crisper drawer if it is already overly crowded.
The Paper Towel Method vs. The Muslin Cloth Alternative
While the standard paper towel method is incredibly effective and accessible, it does require a bit of maintenance. Every 7 to 10 days, you will need to open the container, check if the paper towels have become damp, discard them, and replace them with fresh, dry ones.
The Eco-Friendly Muslin Cloth Hack
If you want a more sustainable, low-maintenance alternative, replace the paper towels with a clean, dry muslin cloth (malmal cloth) or a cotton handkerchief.
Simply wrap your plucked, dry curry leaves loosely inside the cotton cloth like a small pouch or bundle, and place that bundle inside your airtight box. The cotton fabric naturally absorbs excess condensation beautifully and breathes much better than paper, drastically reducing your chances of finding slimy leaves. Plus, you can simply wash and reuse the cloth infinitely!
Material Warfare: Steel Box vs. Plastic Container vs. Glass Jar
The material of your storage container plays a massive role in regulating internal temperatures and moisture levels. Let’s compare the three most common options found in an Indian household:
+--------------------+-------------------------+-------------------------+
| Container Material | Freshness Lifespan      | Performance Level       |
+--------------------+-------------------------+-------------------------+
| Stainless Steel    | Up to 4 Weeks           | ⭐⭐⭐⭐⭐ (Excellent)   |
| (Steel Dabba)      |                         |                         |
+--------------------+-------------------------+-------------------------+
| Glass Jar          | Up to 3 Weeks           | ⭐⭐⭐⭐ (Very Good)     |
+--------------------+-------------------------+-------------------------+
| Plastic Tupperware | 1 to 2 Weeks            | ⭐⭐⭐ (Average)         |
+--------------------+-------------------------+-------------------------+
1. The Traditional Stainless Steel Box (The Winner)
Good old Indian steel dabbas are the undisputed champions for storing green chilies, coriander, and curry leaves. Steel conducts cold temperatures incredibly uniformly, which keeps the inside environment consistently chilly. It doesn’t sweat as much as plastic, meaning significantly less moisture condensation inside the box.
2. Glass Jars
Glass is an excellent, non-porous material that preserves the essential aromatic oils of kadi patta flawlessly. However, glass jars take up a lot of vertical space in the fridge, and because they are clear, exposure to frequent fridge light can slowly degrade the vibrant green chlorophyll over time.
3. Plastic Containers
While convenient, cheap plastic containers trap humidity like an oven. If you use plastic, make absolutely sure it is strictly food-grade, BPA-free, and paired with a reliable moisture-absorbing layer like a cloth or paper towel.
Long-Term Alternatives: Can Curry Leaves Be Frozen?
What if you have access to a massive backyard curry leaf tree and have an overwhelming abundance of leaves that you can’t possibly finish in a month? Can you freeze them?
Yes, absolutely! Curry leaves freeze exceptionally well, and their flavor remains almost 90% intact because their cell walls are incredibly sturdy compared to delicate herbs like coriander or mint.
       PLUCK & DRY            ZIPLOCK BAG             FREEZE
   +-----------------+     +-----------------+     +-----------------+
   | Remove stems    |     | Squeeze out     |     | Store in the    |
   | & ensure leaves | --> | all excess air  | --> | deep freezer;   |
   | are 100% dry.   |     | completely.     |     | do not thaw!    |
   +-----------------+     +-----------------+     +-----------------+
The Correct Way to Freeze Kadi Patta:
- Pluck, thoroughly wash, and completely air-dry the leaves until there is zero trace of surface moisture.
- Put the loose leaves inside a heavy-duty Ziploc freezer bag.
- Press the bag flat gently to squeeze out every single bubble of excess air before zipping it closed.
- Pop it straight into your deep freezer.
Crucial Tip: When you are ready to cook, do not thaw the frozen leaves! If you let them sit on the counter to thaw, they will instantly turn black, soft, and mushy due to ice crystals melting. Instead, take out a handful of frozen leaves directly from the bag and drop them straight into your hot oil tempering. They will crackle gorgeously and retain their pristine green color!
How to Dry Curry Leaves for Long-Term Storage
If you don’t want to deal with fridge space or freezing logistics, turning your fresh kadi patta into dried herbs is a fantastic option. Dehydrated curry leaves can sit safely in your kitchen pantry for up to 6 months to a year without spoiling.
Method 1: Shade Drying (The Best Flavor Retention)
Spread washed and towel-dried curry leaves on a large mesh tray or clean cloth inside a well-ventilated room under a ceiling fan. Let them dry naturally for 3 to 4 days until they become brittle and produce a light paper-like rustling sound when you crunch them. Store them in an airtight glass jar in a cool, dark pantry shelf.
Method 2: The Modern Microwave Hack (Instant Drying)
If you are short on time, try this brilliant kitchen & storage shortcut:
- Place a single layer of clean, dry curry leaves on a microwave-safe ceramic plate lined with a paper towel.
- Microwave them on high power in short 30-second bursts.
- Check and toss them around after every burst. Usually, within 90 seconds to 2 minutes, the leaves will shrink slightly, dry up completely, and become perfectly crisp without losing their signature green color.
Critical Mistakes That Turn Your Curry Leaves Black and Slimy
Are your curry leaves still rotting despite your best efforts? You might be making one of these common structural mistakes:
- Leaving the Stems On: Stems hold a massive amount of moisture and water weight. If you store the whole sprig together, the moisture from the stem will continuously bleed out into the leaves, causing rapid rotting. Always pluck the leaves off the stems before long-term storage.
- Storing in Cheap Thin Polybags: Keeping your herbs inside the thin, transparent plastic bags provided by local vegetable vendors is a recipe for disaster. These bags offer zero protection against cold temperature fluctuations and trap humidity instantly.
- Thermal Shock from Temperature Fluctuations: Taking the container out of the fridge, leaving it open on a hot kitchen counter for 20 minutes while you chop veggies, and then putting it back creates severe condensation inside the box. Take out what you need within 30 seconds and return the box to the fridge immediately.
- Packing the Container Too Tightly: Compressing the leaves squishes their delicate cell structures, causing them to bruise and release juices that attract mold. Keep them loose and airy.
Genius Ways to Use Slightly Dry or Wilted Curry Leaves
What if your curry leaves have started to dry out slightly, lost their crispness, or turned a light brownish-green, but aren’t slimy or moldy yet? Do not throw them away! While they may not look beautiful enough for a garnish, they still contain an incredible amount of flavor.
+-----------------------------------+-----------------------------------------+
| What to Do with Older Leaves      | Quick Preparation Instructions          |
+-----------------------------------+-----------------------------------------+
| Make Kadi Patta Chutney Powder    | Dry-roast the leaves with chana dal,    |
| (Gunpowder style)                 | urad dal, dry red chilies, and salt.    |
|                                   | Grind into a coarse, flavorful powder.  |
+-----------------------------------+-----------------------------------------+
| Infuse Your Homemade Hair Oil     | Simmer the dry leaves in pure coconut   |
|                                   | oil until they turn crisp to create a   |
|                                   | nutrient-rich traditional hair tonic.   |
+-----------------------------------+-----------------------------------------+
| Blend Into a Smooth Curry Paste   | Whiz the leaves up with ginger, garlic, |
|                                   | and green chilies to make a fragrant    |
|                                   | base paste for South Indian curries.    |
+-----------------------------------+-----------------------------------------+
Frequently Asked Questions (FAQs)
Q1. How long do curry leaves actually last in the fridge using the steel box method?
If your leaves were completely dry when you put them in and you are using a paper towel or muslin cloth layer inside a stainless steel airtight box, they will easily remain fresh, green, and aromatic for 3 to 4 weeks.
Q2. Can I use dried curry leaves as a direct replacement for fresh ones in a tadka?
Yes, you can! However, keep in mind that dried leaves have a slightly milder aroma compared to fresh, pungent ones. You might need to use double the amount of dried leaves to get the exact same flavor kick in your sambar or dal.
Q3. Why did my curry leaves turn completely black inside the freezer?
This almost always happens if you thaw them before using, or if the leaves had lingering water droplets on them when you placed them in the freezer bag. The external water freezes into frost, which damages the leaf tissue, turning it pitch black upon exposure to air.
Q4. Is it safe to use curry leaves that have small white spots on them?
No. Small white spots or powdery film on the surface of curry leaves usually indicate a fungal infection (like powdery mildew) or insect residue from the tree. Discard those specific infected leaves immediately to protect the rest of the batch.
See Also
How to Store Curry Leaves Fresh for a Month in Fridge/Kitchen Tips
How Long Does Homemade Ginger-Garlic Paste Last? (And How to Extend It)
How to Keep Bugs Out of Rice and Dals Naturally (Kirana Secret)
Does Garam Masala Go Bad? The Truth About Spice Shelf Life